My top 3 skincare ingredients

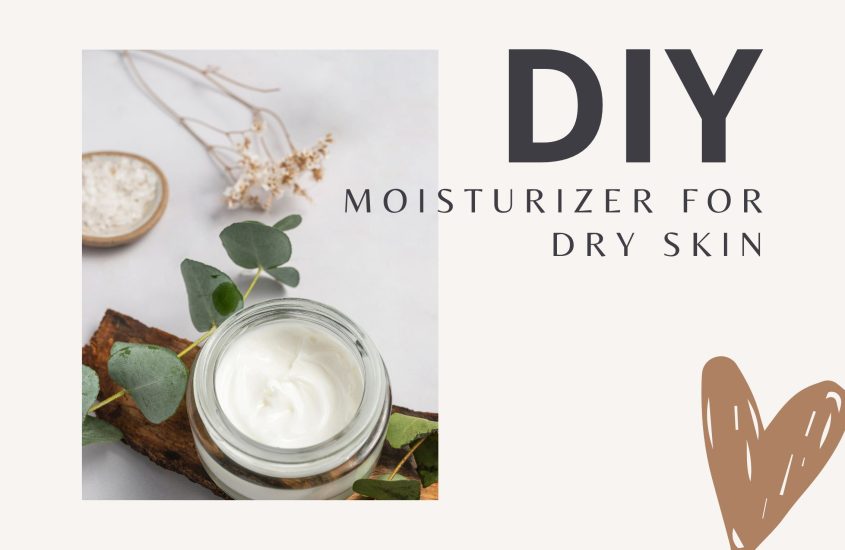
As a skin therapist, I always find it exciting to try out new ingredients, provided they suit my skin type, of course. Fortunately, I have an easy-going skin that doesn’t require too much maintenance. It tends to be a bit dry at times, leaning towards dehydration. That’s why I often look for products that provide hydration and nourishment. In this blog, I’ll share with you three ingredients that I use daily and especially what they can do for your skin.

Niacinamide (Vitamin B3) Suitable for: acne-prone and rosacea-sensitive skin, dry skin.
Niacinamide is a versatile ingredient that can be combined with other active ingredients. It can contribute positively to many different skin issues. As we age, the number of antioxidants in the skin decreases. Niacinamide is an antioxidant, and we need it to keep the skin resilient and strong against harmful external influences. It’s beneficial to replenish these antioxidants to help the skin resist aging signs.
Niacinamide helps strengthen the (disrupted) skin barrier and retain moisture. A damaged skin barrier struggles to retain moisture, which can trigger irritation such as redness and pimples. By strengthening the skin barrier, redness and irritation can be reduced.
Additionally, niacinamide has a mild exfoliating effect, which helps combat dull skin and fine lines. Finally, niacinamide is also effective against acne due to its anti-inflammatory properties. I prefer a serum containing niacinamide because it typically has a higher concentration.

Hyaluronic Acid (HA) Suitable for: dehydrated skin
Hyaluronic acid is a naturally occurring substance in the body, with more than half of it found in the skin. Its primary function is to retain moisture in the skin, allowing it to function optimally and keeping it “wrinkle-free,” so to speak. The action of hyaluronic acid can be compared to water being poured over cracked earth. You’ll notice the cracks disappear. Similarly, when the skin retains more moisture, it appears plumper and smoother.
There are serums containing hyaluronic acid that can significantly help your skin. However, if your skin is significantly dehydrated, the best way to give it a boost is through mesotherapy. This treatment, also known as a ‘skin booster treatment,’ involves injecting hyaluronic acid into the deeper layers of the skin using tiny needles. This process hydrates and strengthens your skin from within, reducing the visibility of fine lines.

Vitamin C (ascorbic acid) Suitable for: all skin types, dull skin.
You might think it’s easy to squeeze extra oranges in the morning, hoping your skin will absorb some of it. However, unfortunately, only 1% of this reaches the skin, so we need to apply these vitamins from the outside to nourish the skin.

Vitamin C naturally occurs in our skin. Due to sun exposure, vitamin C breaks down, making the skin less resilient. Products containing vitamin C are therefore popular because they provide the skin with many benefits. The antioxidant properties of vitamin C protect your skin against harmful external influences such as UV radiation and pollution. At higher concentrations, vitamin C also has brightening effects on superficial pigmentation by stimulating collagen production. So, it’s also a good ingredient for evening out the skin tone.


There, those were the ones. If you have any questions about the products I use and enjoy using, feel free to send me a message. Perhaps I can help you further 😉

Love, Fabienne

DIY: moisturizer for dry skin

I love making my own moisturizer, and I mainly use them to moisturize my body. By selecting the ingredients yourself, you can tailor the moisturizer to meet your skin’s specific needs, which I find to be the best part. There are several different methods for making your own moisturizer. In this blog, I’ll show you a very simple method for making a basic moisturizer with just four ingredients. At the bottom of this blog, you’ll find an instructional video, but be sure to read through this blog first before you start!

Kies ingrediënten die bij jouw huidtype passen:

 Dry SkinOily SkinSensitive Skin
Oil Type (organic)Avocado oil
Coconut Oil
Olive Oil
Argan Oil
Almond Oil
Line Seed Oil
Almond Oil
Hazelnut Oil*
Wild Rose Oil
Jojoba Oil
EmulsifierLamecrèmeLamecrèmeLamecrème
Thickners/ButtersCacao Butter
Shea Butter
Cacao Butter
Mango Butter
Shea Butter
Water SortDistilled Water
Rose Water
Distilled Water
Rose Water
Distilled Water
Rose Water
There are many more ingredients you can add to your moisturizer, but based on this schedule, I’ll give you an idea of where to start your search. *be careful with allergies!

Supplies for 100 ml /  3.3 fl. oz. Moisturizer: 

  • Small beaker glass (100 ml)
  • Large beaker glass (1Litre)
  • 2 small glasses or saucers
  • Thermometer
  • Stirrers
  • Digital scale
  • Alcohol 96%
  • 1 cotton pad

  • 225 grams organic oil by choice
  • 8 grams lamecreme
  • 4 grams butter such as mango or shea butter
  • 63 grams of distilled water

Step 1
Wash your hands and clean the materials. Apply some alcohol to the cotton pad and wipe the inside of the beaker glasses, the scale, and the thermometer.

Step 2
Weigh each ingredient separately. Weigh 63 grams of water in a small beaker glass. This is the water phase. In a large beaker glass, weigh 25 grams of oil. Weigh 8 grams of moisturizer base on a separate saucer or in a glass, and 4 grams of butter. Add the moisturizer base and butter to the oil. This is now the oil phase.

Step 3
Heat the beaker glass with the water phase and the oil phase in a double boiler. Remove them from the heat source when the oil is clear (meaning the butter and moisturizer base are dissolved). Neither phase should exceed 70 degrees. 

Step 4
Gradually add the water to the oil while stirring continuously. Do not do this the other way around! Stir for at least 10 minutes until a homogeneous mixture is formed. After a few minutes, the mixture will start to look flaky. At this point, the oil and water will begin to bind. Continue stirring vigorously.

Step 5
Let the mixture cool to 40 degrees. Optionally, add fragrance and/or preservatives. When the mixture is completely cooled, you can store it in a jar or dispenser. I always prefer a dispenser because it keeps the moisturizer fresh for longer without exposure to bacteria, light, or air.

Cold Pressing
There are different methods for obtaining vegetable oils. One of those methods is cold pressing, where the oil is obtained from the material without a heating process. During this process, the valuable substances of the plant remain intact. So, when purchasing your ingredients, keep this in mind.

Allergens
Optionally, you can add fragrance and preservatives to the moisturizer. But if you are prone to irritation, I advise against it. Moreover, the moisturizer smells nice even without adding these ingredients. 

And then the most important thing…

  • Do not use homemade moisturizer as sunscreen; instead, use safe sunscreen that you can buy in stores. 
  • Do not use homemade moisturizer to treat skin problems such as acne, rosacea, pigmentation, melasma, skin irritation, psoriasis, or any other skin problem. Always consult a skin therapist or dermatologist for advice. 

  • Making your own moisturizer is mainly a fun activity. The ingredients I use in the video are very mild. If you’re still unsure, test a small amount on a small patch of skin before using the moisturizer entirely. 

Good luck with making your own moisturizer! Will you let me know if it works or if you have any questions? 

Love, Fabienne

Source: Lexicon van Cosmetische Grondstoffen, (2013)

https://www.youtube.com/watch?v=YeCrMOcHl1o

DO HIMALAYAN SALT LAMPS HAVE PURIFYING EFFECTS?


“A Himalayan salt lamp is a lamp made from a large piece of Himalayan salt, sourced from the Himalayan mountains. A hole is drilled into a salt chunk so that a lamp or tealight can be placed inside. These atmospheric lights are available in various shapes and sizes. The reason I have four Himalayan salt lamps in my house is mainly for the cosy natural atmosphere they create. However, the lamps are also said to have a ‘purifying’ effect. I’ve researched exactly how this works. Are you joining me?”

Ionization
An ionizer is a device that ionizes molecules. Ionization is the process in which an atom or molecule loses or gains an electron from its uncharged state. Ionizers produce a stream of charged particles (ion flow) in the air that cause dust particles in the environment to settle. In theory, this has a beneficial effect on air quality and may therefore affect health issues related to air quality, particularly asthma (De Meer, Duijm & Hall, 2010). Himalayan salt lamps are said to produce and subsequently release negatively charged ions into the air by heating the salt (through the lamp or candle). Research has shown that the amount of these ions is so low that it cannot be considered to have a similar positive effect (Ferreira, 2016).

Humidity
The air in your home contains moisture, known as humidity. Salt attracts water, so the salt lamp in your home draws in some of the humidity. Bacteria, allergens, and moulds present in the air are also drawn and attracted to the salt lamp, thereby “purifying” the air in your home. Salt doesn’t attract moisture, but the salt lamp consists of a molecular compound of NaCl (Sodium Chloride). The moisture in the air that comes into direct contact with it undergoes a chemical reaction. The H2O in the air that comes into contact with the salt lamp/NaCl undergoes a reaction. So, this would mean that only the moisture and bacteria floating around the salt lamp are attracted to it and purify that particular area of air.

So, if you want to completely “purify” the air in your home, you would need to stack quite a few salt lamps both horizontally and vertically so that the moisture in contact with the lamp can be attracted.

Just kidding! But if you do want to effectively purify the air in your home, you might consider investing in an air-purifying fan from Dyson, for example. Nonetheless, salt lamps remain very atmospheric, and that’s why I have them in my home. If you’re interested in getting a salt lamp yourself, I’ve listed some places below where you can buy them. However, it’s more fun to go to a store and choose one that you really like. Salt stones come in various types and sizes, and they are also reasonably affordable. The most popular variants are the tea light holders and the lamps.

Tip for the Rotterdam resident (or if you’re in Rotterdam): Pay a visit to Mystiek in Rotterdam at Schiedamse Vest 79 (Witte de Withkwartier). It’s a delightful store where you can find everything related to spirituality and health.

Sources:

de Meer, G., Duijm, F., Hall E. F. (2010) Ionisatoren en gezondheid. Geraadpleegd op 14 mei 2020 van: https://www.rivm.nl/bibliotheek/rapporten/609330004.pdf

Ferreira, M. (2016) Do Himalayan Salt Lamps Really Work? Geraadpleegd op 14 mei 2020 van: https://www.healthline.com/health/himalayan-salt-lamps

This site is registered on Toolset.com as a development site.